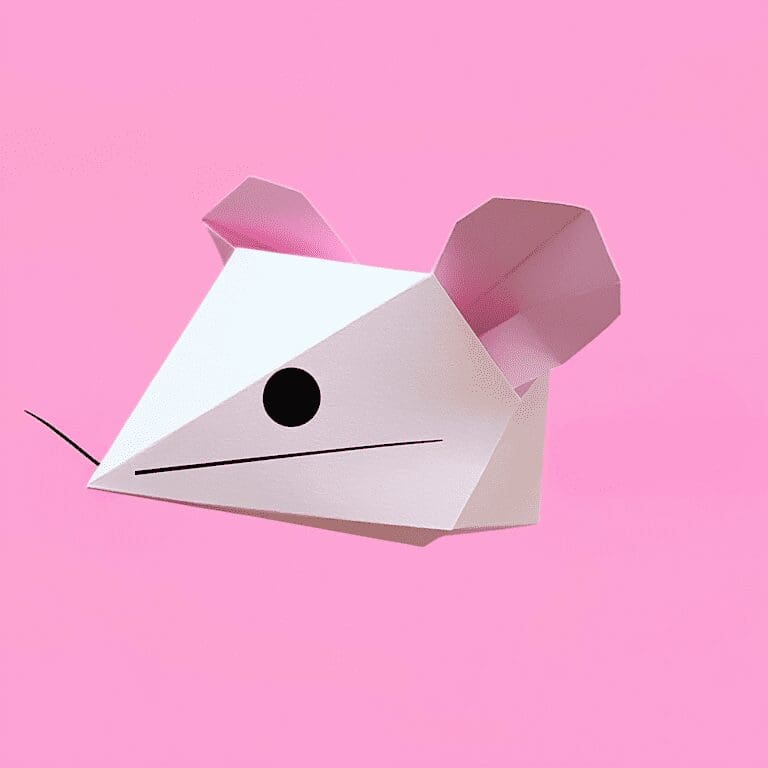
Imagine just playing with a piece of paper and getting a crafty origami mouse out of it – how cool is that? Origami, the super fun Japanese art of paper folding, lets you turn flat sheets into all kinds of awesome 3D shapes.
One of the cutest projects you can try with this is the adorable origami mouse! With just a few simple folds, you can transform a plain piece of paper into your very own mini-mouse friend.
These little paper mice are perfect if you want to make an origami mouse as a decoration for your child’s room, a fun toy, or even as part of a bigger display, especially during the Year of the Rat.
So, are you ready to make your own mouse? Follow the easy step-by-step instructions below and get ready for an awesome hands-on crafting adventure!
What You’ll Need
Method
1. Begin with a square piece of origami paper. If you’re using standard 8.5×11 paper, you can easily turn it into a square by folding one corner diagonally and trimming the excess.
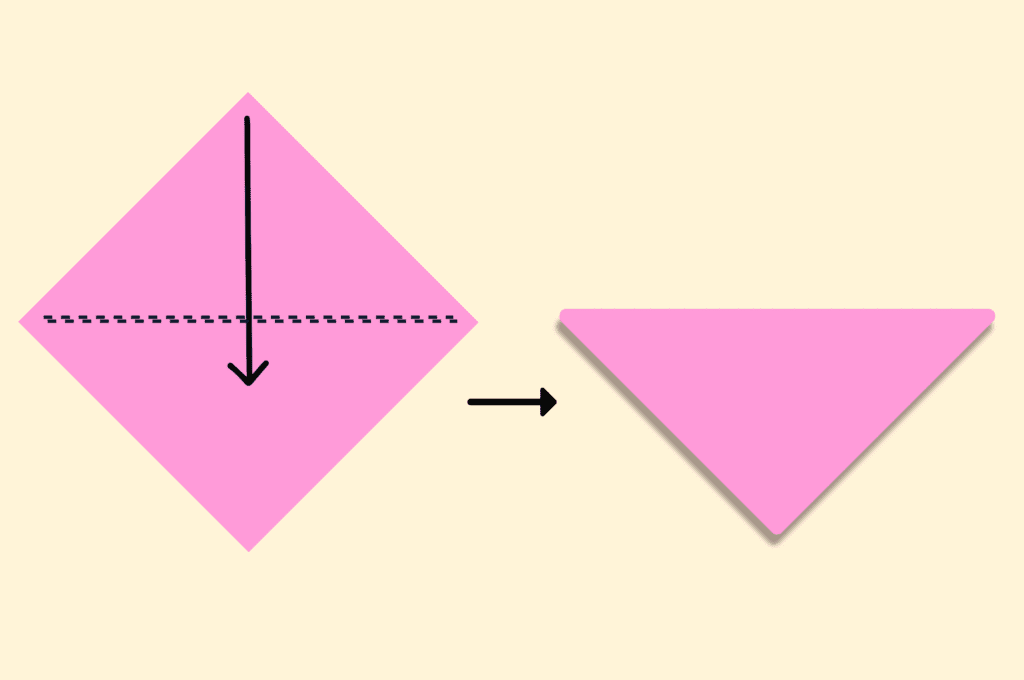
2. Fold the paper in half by bringing the top corner down to meet the bottom corner, creating a triangle.
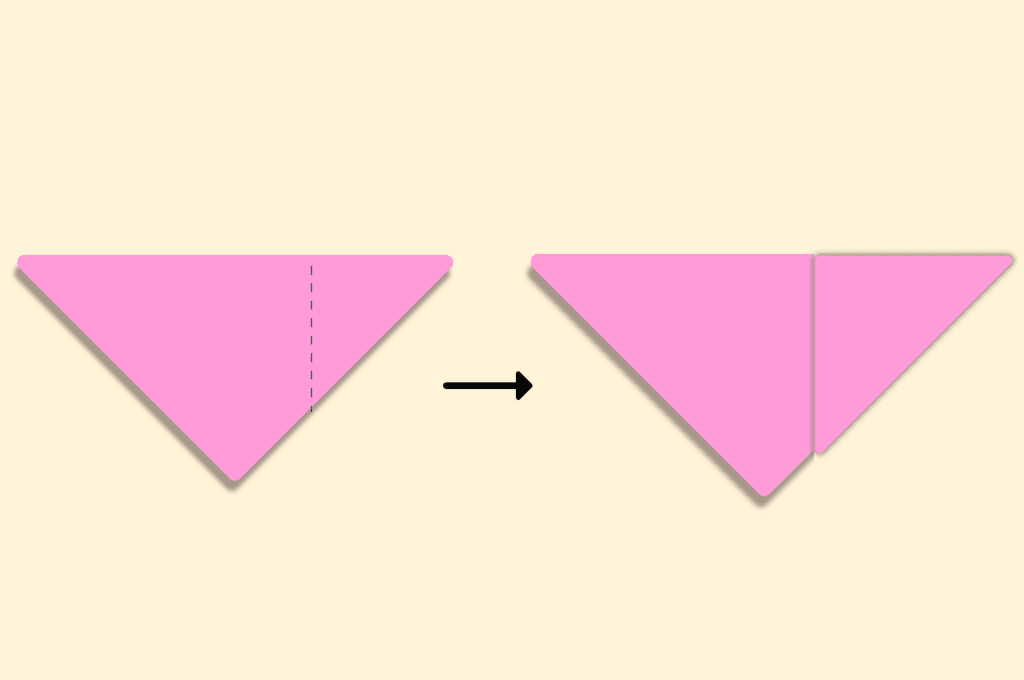
3. Take the right corner of the triangle and fold it over toward the left, just off-center. This will start to shape the mouse’s head.
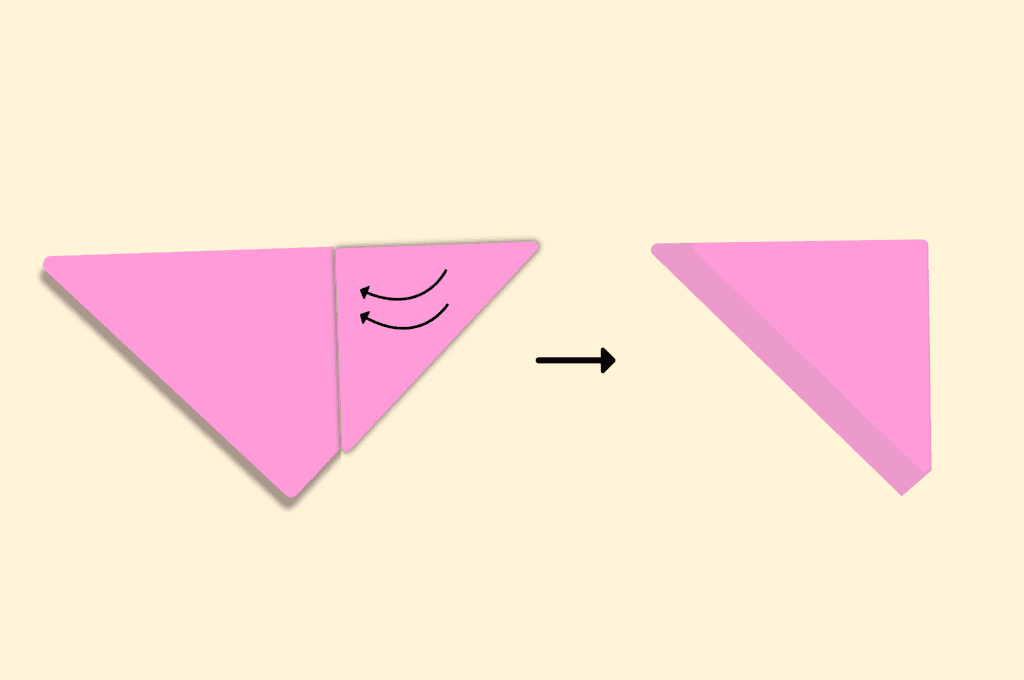
4. Fold back a small portion of the flap you just created, angling it slightly upward to form one of the mouse’s ears.
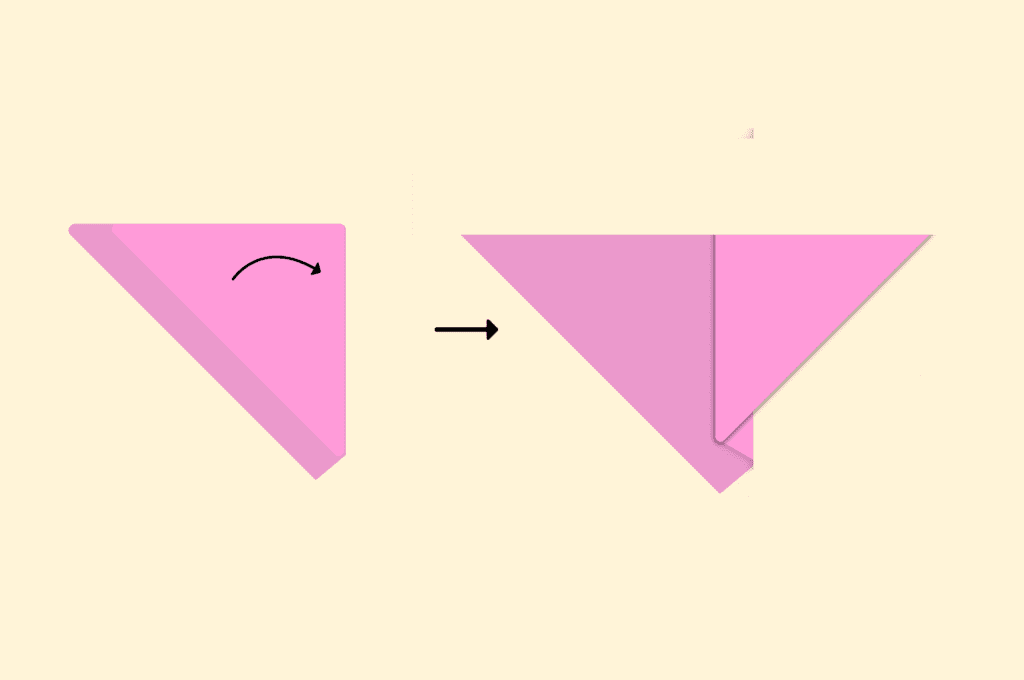
5. Tuck the bottom point of the triangle underneath the figure to complete the head shape. Finally, draw on the eyes and nose to bring your origami mouse to life. And there you have it!
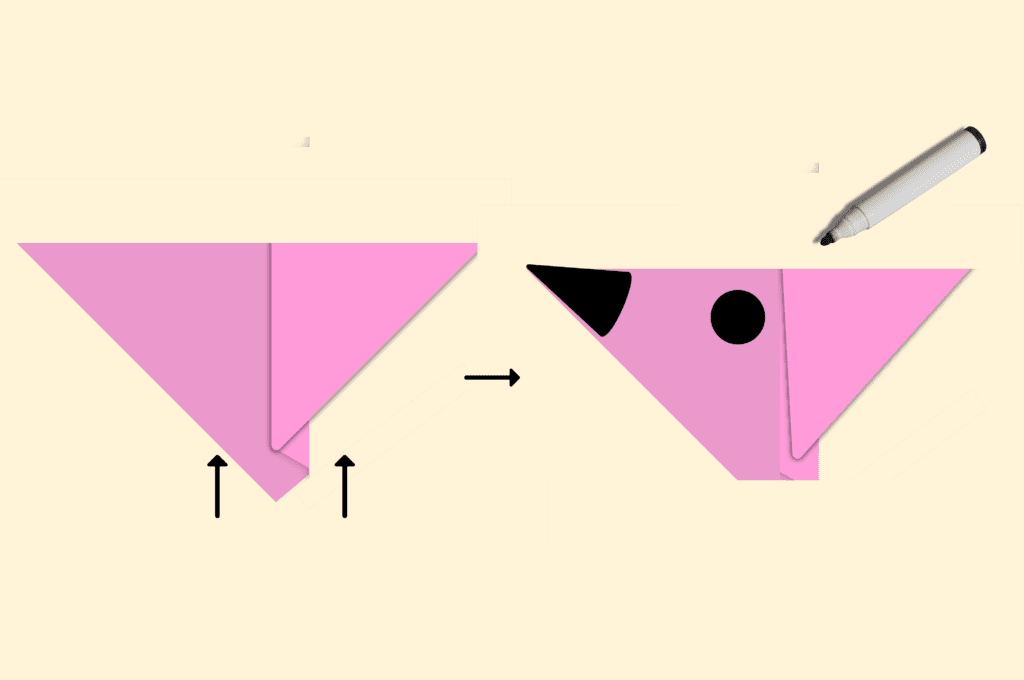
You can leave your mouse plain, or use colored pencils or markers to add details like eyes, whiskers, and a tail. With a little practice, you’ll be folding adorable origami mice in no time.
These cute little creations are perfect for adding a personal touch to gifts, decorating a desk or bookshelf, or even creating a playful scene with other origami animals.
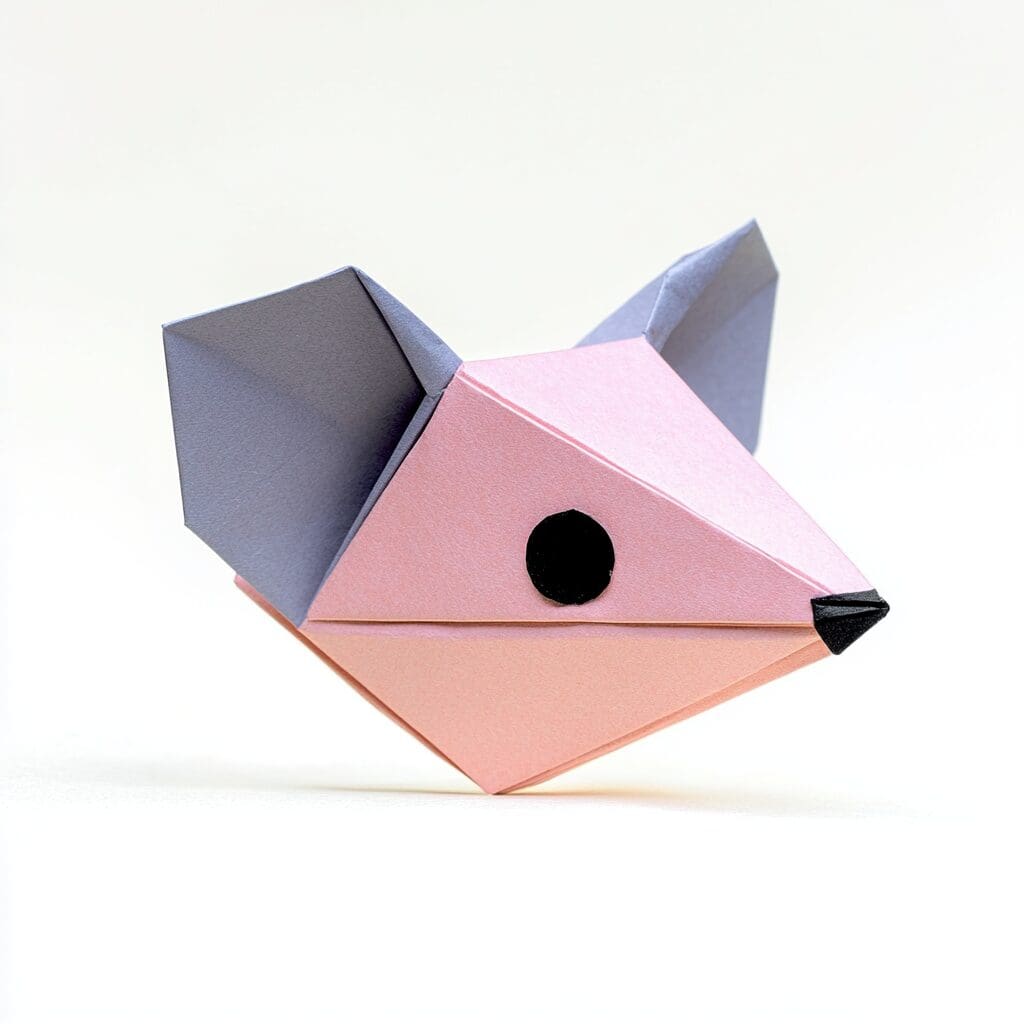
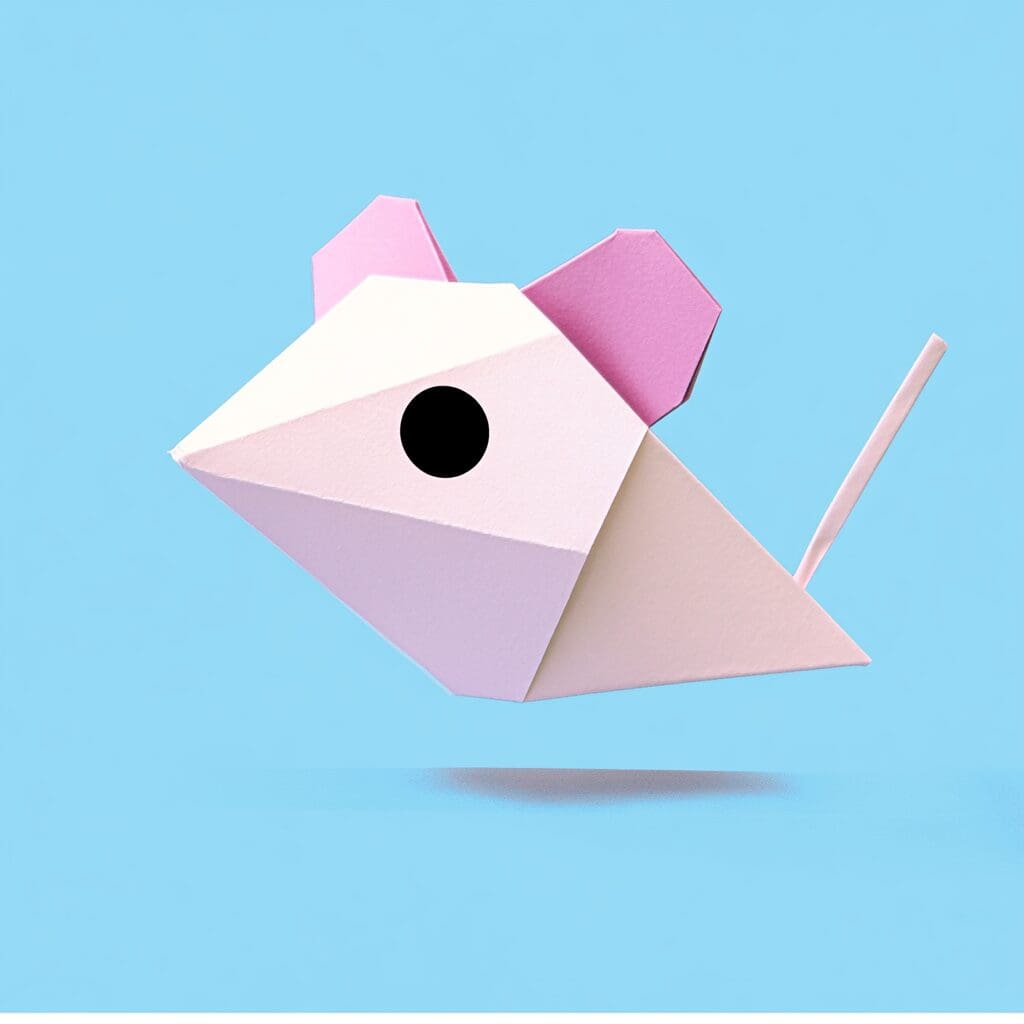
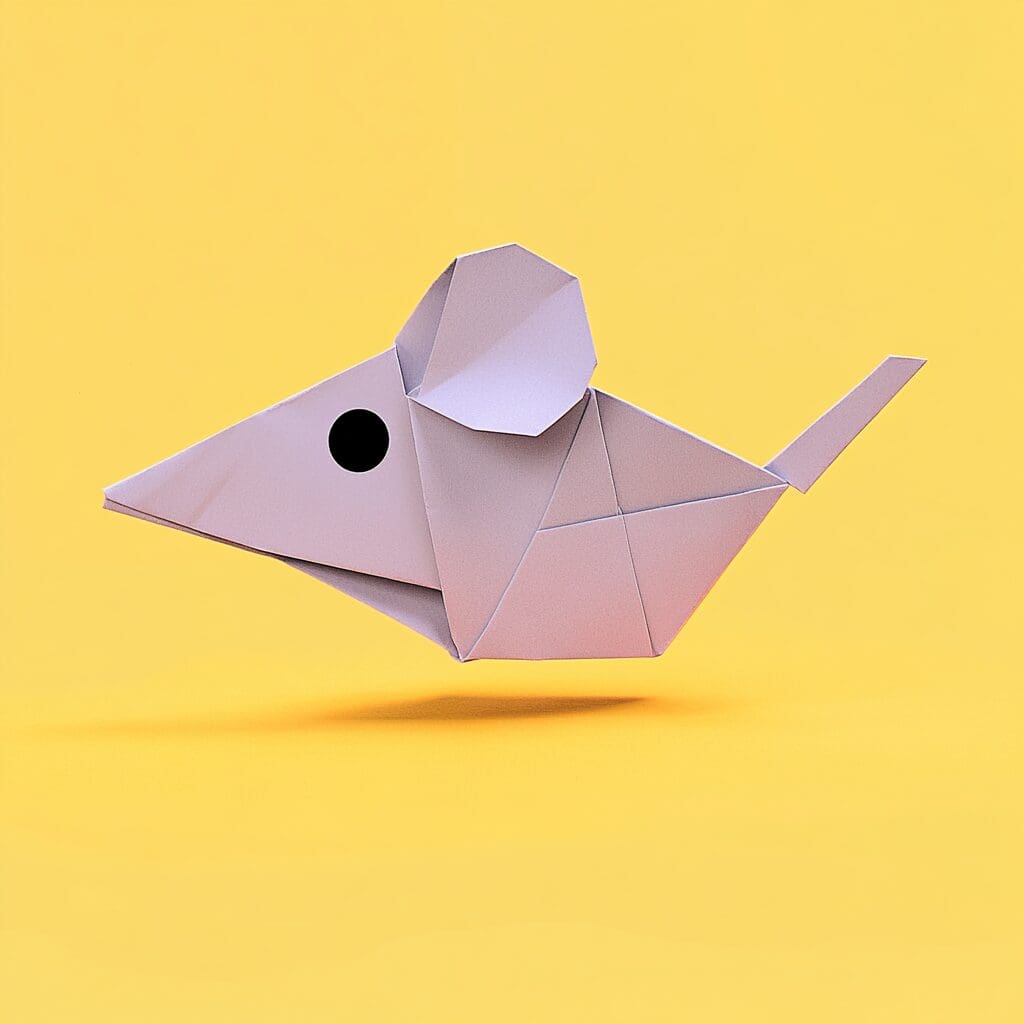
For a creative twist, try experimenting with different types of paper, such as patterned or textured sheets, to give your origami mouse a unique look. You can even create an entire family of mice in various sizes by adjusting the size of your paper. These small adjustments can turn a simple project into a delightful display of creativity.
In addition to enhancing your origami skills, consider exploring other crafting projects that allow you to mix and match techniques. For example, you could create a small origami habitat for your mouse, complete with trees, flowers, or other animals. This not only adds to the fun but also helps improve your spatial awareness and precision as you work on more complex arrangements.
Once you’ve mastered the origami mouse, why not challenge yourself with more exciting crafts? From intricate designs to simple projects like the floating paperclip experiment, there’s always something new to discover. Check out our other crafts ideas for more fun and educational activities that will keep you and your family entertained! Happy crafting!
FAQs
Source

